
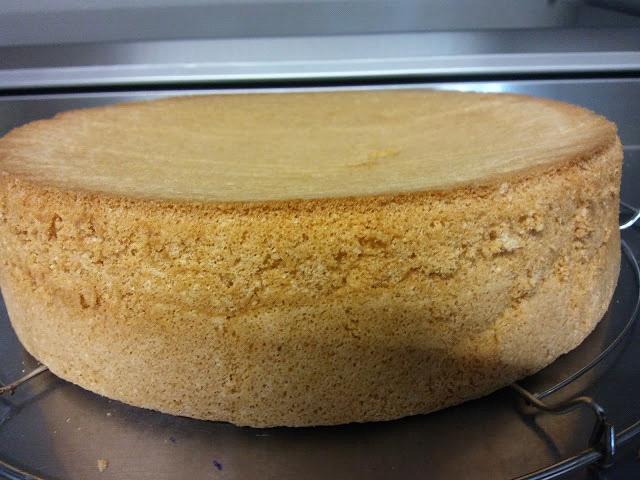
Basic Sponge Cake Base (Pandishpan)
The author's classic sponge cake base for a 26 cm cake tin, with all her step-by-step tips for perfectly beaten egg whites and a flat, level sponge.
Ingredients
| 6 pcs | eggs, size M | |
| 200 g | sugar | |
| 200 g | flour | |
| 5 tbsp | 75 ml | warm water |
| 1 tsp | 5 ml | baking powder |
| 2 packets | vanilla sugar |
Instructions
Don't wonder why this sponge is so flat on top — I simply turn it upside down (bottom up) while it cools. That way the cake comes out more level too. I recommend you do the same when making cakes.
- I always prepare the cake tin first: I line the bottom with baking paper and then clip the movable sides of the tin. I grease it with oil and dust it generously with flour.
- The second thing I do is turn on the oven to preheat at 175 degrees without a fan, or 160 degrees with a fan.
- Next, carefully separate the egg whites from the yolks. With the whites it is important that no water or any bit of yolk gets in. The bowl for the whites must be very well dried.
- Beat the egg whites with a mixer on maximum speed until stiff peaks (firm snow). This can take more than 5 minutes of beating. As a child I used to beat them by hand with a whisk — believe me, it is quite laborious; my arms would give out, switching left to right, left to right — but I got perfect stiff whites.
- A tip on separating eggs easily (as my mum taught me): crack the egg on a good sharp edge of a table or bowl, trying to hit exactly in the middle of the egg. You get a kind of crack into which you gently push the thumbs of both hands and pull the shells apart, keeping the yolk in one half while the white runs into the bowl below. Then gently transfer the yolk from one half of the shell to the other, and so on until all the white has run into the bowl below.
- I know the whites are ready when the mixer attachments start leaving streaks in the mixture, or when I turn the bowl over and the whites don't run.
- In another bowl, mix the yolks, water, sugar and vanilla sugar. Beat everything again for about five minutes with the mixer. The mixture is ready when it changes color from yellow to almost white and becomes fluffy.
- Measure the flour and mix it with the baking powder. Stir. If I want a dark cocoa sponge, I add two tablespoons of cocoa as well.
- Start adding the flour to the beaten yolks in several additions, alternating with the beaten egg whites. Do not beat with the mixer anymore — mix very gently only with a whisk, folding from the bottom upwards, or from the bottom of the bowl toward the opening. Continue until you get a smooth mixture and all the flour and stiff whites are used up.
- Pour the mixture into the prepared tin. Always try not to level it, but to push it from the middle toward the edges — rather have the middle a little lower, by about half a centimeter, than the edges. I do this so the sponge doesn't dome or rise higher in the middle than at the edges during baking.
- Put the cake tin in the preheated oven and set the timer for exactly 30 minutes. Just in case, test with a toothpick before removing the sponge — poke it and if the toothpick comes out dry, all is well. Turn off the oven and wait 3 minutes before taking out the sponge (there's a risk it collapses from a sudden temperature change).
- Leave the tin to cool for about 5 minutes, then run a knife to release the sponge from the sides and open the tin.
- Wait a little more, then separate the sponge from the bottom and peel off the paper. Leave the sponge on a rack to cool completely.
- You can cut the sponge into two or three layers, depending on the cake — but only once it is very well cooled.
Note: If I want a dark sponge base, I add 2 tablespoons of cocoa to the flour, but reduce the flour amount to 190 g.
You can find many cake recipes here! And you will surely get a perfect sponge if you add plenty of patience and love while making it.
Join my culinary Facebook group — "Обичам да готвя!" (I love to cook!), a place for people in love with cooking and "Ухае на...!".