
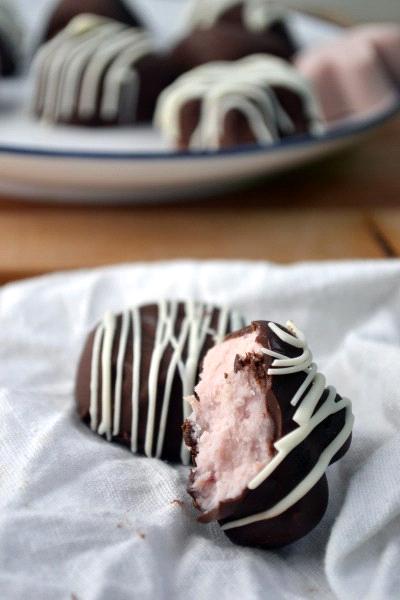
Coconut Orange Cream Filled Chocolates
Dark chocolate candies with a creamy coconut and orange center, optionally decorated with white chocolate.
Ingredients
| 1/2 C | coconut butter (I used homemade) | |
| 1/2 C | orange juice (use blood orange for a slightly pink color but you may need to add slightly more sweetener as it's a little more tart than a regular orange) | |
| 1/2 tsp | 2.5 ml | very finely grated orange zest (optional, but the flavor from the juice is very mild) |
| 2-3 tbsp | 30–45 ml | raw honey, agave, or other mild flavored liquid sweetener |
| 1 pinch | sea salt | |
| 3 1/2 oz (about 100 g) | dark chocolate (I used a dark chocolate Lindt bar) | |
| 2 tsp | 10 ml | coconut oil |
| 1/4 C chips | white chocolate to decorate if desired |
Instructions
Makes approximately 24 1 tbsp sized candies.
If not able to purchase coconut butter, start by making coconut butter in a blender or food processor. I have found that a larger grate of coconut works best, and be sure to use unsweetened. Be aware that your homemade coconut butter will take a long time to become butter – approximately 10-15 minutes and may not be as smooth as a store bought butter, but will still be delicious and will work just fine in these candies. Coconut butter takes about 12-13 minutes in my food processor with about 3 cups of shredded unsweetened coconut (it wont work as well with a small amount, so you will have quite a bit extra left over) and I usually only scrape it down from the sides once, after it's become somewhat buttery already. Be sure to process until the butter is very liquidy and not clumpy at all. It may still be a little grainy unless you have a high powered blender, but that's fine.
- To make the coconut cream center, in a small bowl combine liquified coconut butter (you can simply do this in the microwave for a few seconds if it's hardened, or if you make your own coconut butter, just use it right after blending as it will be liquid) with freshly squeezed orange juice. You can strain any pulp out if you want, but I kind of liked the little flecks of color. Add the zest, honey or other sweetener and sea salt. Mix very well, being sure to scrape the sides of the bowl to combine everything.
- Carefully spoon the mixture into small silicone moulds, or plastic chocolate moulds may even work well too. The mixture will still be very liquid, very gently place the filled moulds into the freezer on a level surface. If that's not possible, place in the fridge for 15-20 minutes before and they will have solidified enough to place on an uneven surface to freeze completely. Freeze for at least 1-2 hours until solid.
- Remove from the freezer and remove the candies from the mould onto a sheet lined with parchment and return to the freezer to keep cold as they will warm up fast.
- Chop the chocolate into small pieces and melt in a double boiler or very carefully in the microwave with the coconut oil. I can't guarantee that chocolate chips will dip as well so use a bar of chocolate if possible. If using the microwave, be sure to stir frequently to avoid burning it. Once completely smooth, set the chocolate aside to cool it down. I just had to let mine sit about 10 minutes until it was just barely warm. Too hot and the chocolate will melt the coconut candies, so be patient if it's too hot.
- Once ready to dip remove the coconut candies from the freezer. Working quickly, drop the candy, top down, into the chocolate. Using a fork, quickly flip the candy over and make sure it's completely covered in chocolate before lifting the candy up and letting a little (if any) of the chocolate drain off before carefully setting it back on the sheet, using another fork to push it if needed. I used a sheet lined with a non-stick silicone baking mat, but wax paper should work just as well. Completely cover all candies with chocolate and return to the freezer for 10-15 minutes to make sure they're completely solidified.
- If decorating with white chocolate, melt the chocolate and place in a small ziploc bag. To decorate, remove the candies from the freezer and cut the corner off the plastic bag and squeeze the chocolate through (being sure to cut a small enough opening to get a thin stream of chocolate). Decorate as desired and chill for 5 minutes before placing in an airtight container in the fridge until ready to serve (or at least 1 hour).
Note: Alternatively if you have no moulds to shape these candies, I believe it would work if you poured the mixture into a shallow pan or container and freeze it until solid. Then remove it from the container, cut into bite sized pieces and then freeze again for a few minutes before dipping in chocolate. I have not tried this, but I'm sure it would work, especially if the container is lined with plastic wrap or something to pull it out of the container once solidified.