
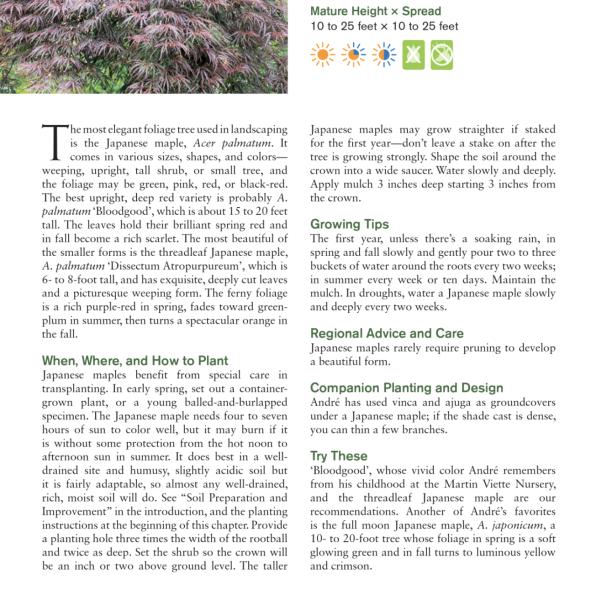
Japanese Maple Bonsai (Acer palmatum dissectum)
Ingredients
Instructions
Japanese Maple Bonsai (Acer palmatum dissectum)
DESCRIPTION The Japanese maple (Acer palmatum) is a deciduous tree native to Japan. As the tree matures its leaves change color through the season, opening green, turning orange, and finally deepening to rich red. Its branches are flexible, which makes the species exceptionally well suited to bonsai training. Several naturally dwarf varieties - such as 'Kiyohime', 'Kashima' and 'Yatsubusa' - have small leaves, shoots, branches and trunks and are ideal for bonsai; unlike most palmatum varieties, these dwarfs already carry dense foliage and often need their leaves thinned to let light into the canopy. The tree suits many bonsai forms: broom, informal upright, group plantings, raft, twin trunk, clump and weeping.
POSITION, LIGHT AND CLIMATE Japanese maples grow best in USDA zones 5 and 6. They do not tolerate direct summer sun and should generally be protected from both sun and wind, because the leaves are prone to sun scorch and wind scorch. This caution matters most in the US, Australia and similar hot climates; in cooler climates (e.g. the UK) strong, well-rooted, healthy specimens can take full summer sun, which actually produces smaller leaves, better back-budding, denser foliage and stronger autumn color. Trees with weak or recently root-pruned root systems cannot supply enough moisture to the leaves in strong sun or wind and will scorch, so give them a sheltered spot. When in doubt, err toward protection. The ideal setting is dappled/filtered shade, such as under large shade trees; morning sun with afternoon shade prevents sun scald while reducing watering needs. Red-leaved varieties keep their red pigment best with 4-6 hours of morning sun but want afternoon dappled shade in southern regions; green-leaved varieties need late-afternoon shade in the south but tolerate full-day sun in the north; multi-colored and variegated leaves need the most shade. Mature trees tolerate short freezes but must be protected from severe frost. Good air circulation is essential to prevent powdery mildew.
WATERING Keep the soil evenly moist at all times. Water more often during active growth - daily from mid-spring to late summer. In winter water only as needed so the soil does not dry out. Because the roots are shallow, keep a layer of mulch to slow evaporation and protect the roots from wind and sun. Check moisture with a finger about 1 cm deep; when the surface starts to dry it is time to water. Soil mix matters: a water-retentive mix needs less frequent watering. Water before the heat of the day. Newly planted spring trees should be checked daily and watered every 2-3 days for the first month, then about once a week (more on windy days). Fall-planted trees need watering once a week when there is no snow or rain cover.
SOIL AND REPOTTING Grow in Japanese akadama clay, the best medium for the species. Target soil pH is 6-7 (slightly acidic); below 7 is acidic, above 7 alkaline. To raise pH add pelletized limestone; to lower it use soil sulfur, aluminum sulfate or chelated iron. Adding organic compost or using it as mulch also increases and maintains acidity. Humidity should be kept moist. Repot young trees once a year; trees over 10 years old every three years. Repot in spring before the buds open. Do not disturb the roots at the wrong time: a leafed-out deciduous tree in active growth may be moved into a larger pot but its roots must not be cut. When developing a leafed-out tree, cut all shoots back above the first node/bud pair (leaving at least 1 cm), then, once it grows, pinch buds again after a new node; drive the plant to make many new buds on the existing roots and only then repot. The best time to repot Acer is early spring, right as the sap begins to rise. Note that a leafed-out deciduous tree should also not be wired - it will exhaust the tree. In its first year such a tree should only be pruned, nothing more.
FERTILIZING In early spring, as leaf buds open, feed every one to two weeks with a high-nitrogen fertilizer. Once the leaves harden off, feed every other week through spring and summer with a diluted fertilizer, easing off strength or frequency during the hottest days. Switch to a nitrogen-free formula in late summer/autumn and taper off before winter; do not feed in winter. Low fertilization can give shorter internodes on developed, mature trees, while too much fertilizer causes leggy growth. Do not fertilize right after repotting - wait for new growth, start lightly, then move to stronger summer feeding. If leaves yellow, an occasional acidic or alkaline fertilizer can be applied. Nitrogen drives leaf and stem growth, phosphorus healthy roots, and potassium overall plant health. Do not fertilize an unhealthy or diseased tree; only feed once it is healthy. Follow product instructions to avoid over-fertilizing and nutrient burn, and always water before feeding since nutrients are only absorbed from moist soil. Older, more mature trees are fed less often. Two extra tips: avoid fast-release fertilizers in early spring - use controlled-release types that release nutrients slowly in cool soil; and keep a 3-4 inch mulch bed (at least as wide as the canopy) to keep the soil and roots cool and delay early bud break.
PRUNING AND SHAPING Prune roughly twice a year. The main structural pruning is done in mid-winter before warm weather arrives - early February in most regions, January in southern zones 7-10 - which is the time for major training and corrective cuts. A light second pruning follows right after the spring flush hardens off, to clean up unwanted wild growth. Avoid pruning in late winter/early spring, since it triggers premature growth that can be killed by later freezes, and avoid fall and winter cutting because cold can cause twig dieback; wait until early spring to remove dead stems. Pinch out the tips of new shoots once one or two pairs of leaves form to hold the shape. Ordinary trimming: after new growth reaches 3-5 pairs of leaves, cut back to 1 or 2 pairs; large individual leaves can be removed (leaving the petiole) and will be replaced by smaller, finer foliage. To thin the canopy and let light reach inner branches, remove growth close to the trunk, leaves that hang below branch level, and oversized leaves. Maples back-bud readily from old and new wood, so heavy pruning is possible almost year-round, but they back-bud mainly from internodes - cutting a branch back beyond its first node risks losing it. Acer palmatum bleeds heavily if pruned in early spring (root-pruning beforehand reduces this); general maintenance and thinning is best done in autumn after leaf fall. Large branch removal or trunk chops that leave big wounds are best in mid-to-late summer when healing and callus form quickly; avoid large wounds before midsummer, when callus forms poorly and can cause dieback. Japanese maples have opposite buds - pairs of small branches growing directly across from each other, forming a "Y" with the main branch; when pruning you often remove the central branch and keep the two that form the "Y", cutting close to the center of the "Y".
DEFOLIATION Defoliation can be done at midsummer on healthy trees only. Do not defoliate weaker red-leaved varieties. Green-leaved varieties respond well, but should not be defoliated two years running or in the same year as root-pruning. Defoliation increases budding (denser leaves and twigs), produces shoots with shorter internodes, and reduces leaf size. Defoliating a weak tree may not kill it but will not give the desired result and can even produce the opposite - a few large leaves on branches with long internodes.
INTERNODES AND PINCHING The main aim of pinching Acer palmatum is to keep internodes (the distance between leaf pairs) short, because branches with long internodes have poor ramification and sparse foliage. Long internodes are common on vigorous, immature growth and after trunk chops or hard pruning, and make it hard to build a dense canopy, often leaving bare areas. The most vigorous shoots open first in spring; pinch these first buds out, using tweezers to open the newly opening leaves and remove the central shoot before it can be taken by hand (by then internodes have already extended too far). A second, weaker budding follows in 2-3 weeks with shorter internodes, and energy is redirected to the slower, weaker buds inside and lower on the tree. When you have a choice of which shoot to remove, always cut back the ones with the longer internodes. A "sap drawer" technique also helps: after bud-break, pinch all apical buds except one, which is left to soak up the tree's excess energy and protect the other branches from long internodes; once the first flush slows the sap drawer can be removed, or left longer to thicken a branch.
WIRING Wire, if needed, in summer when the tree is in full leaf, or in early spring when the branch structure is clear and the tree sets new growth well; do not wire in winter, when branches are brittle and snap. Watch the bark closely during fast growth, as wire bites quickly. Never leave wire on longer than six months (sooner if it starts to bite), and protect the delicate bark with raffia. If wiring in autumn, wrap with raffia for extra protection because branches will not heal until spring.
PROPAGATION - CUTTINGS Because growing maples from seed takes a very long time, cuttings are the usual route. Take softwood cuttings 4-6 inches long in early to midsummer, just as new growth begins to harden. Remove all but the top pair of leaves. Many cultivars root poorly and failure rates can be very high. Bottom heat improves success, and cuttings should be kept shaded to encourage rooting.
PROPAGATION - FROM SEED Japanese maple seeds need a long cold treatment (stratification) before they germinate. In all methods, first break the wing off each seed (keep the seed-bearing part) and soak the seeds in warm-to-hot water for 24 hours; viable seeds sink, floaters are usually not viable.
- Method 1 (cold zones 4-7): after soaking, sow seeds in a well-draining seed-starting mix (add perlite) in a flat or a drilled dish pan, cover no more than 1/4" deep, and fit hardware cloth over the top to keep out rodents. Set the container outside for winter - freezing and snow cover are fine (snow insulates); freezing slows but does not stop stratification. As spring nears, watch for sprouting and remove the hardware cloth as leaves start to emerge; move to shade (40-50% filtered sun), water only as needed so the medium stays warm and not soaking wet. Seedlings emerge in 2-3 weeks in warm weather, first showing cotyledons (which later wither as the true leaves take over). Give first-year seedlings only about 50% sun to avoid leaf burn; they become more sun-tolerant with age.
- Method 2: collect seeds in fall as they turn brown, store dry in a paper bag in a cool place. Count back 100 days from your safe planting date, then break wings, soak 24 hours, mix seeds with damp sand/peat or perlite-rich mix in a zip freezer bag (air pressed out, a few vent holes), and refrigerate 90 days at about 38-50 F (main-fridge temperature). Check periodically for mold, adding a little general fungicide only if needed. After 90 days plant sprouted seeds in a flat; leave the rest at room temperature or outside to sprout over the following weeks. Give seedlings gentle light (artificial or shaded outdoors) - direct sun burns them.
- Method 3: like Method 2 but soak the seeds three times for 24 hours each (72 hours total, changing the water), then spread on a damp paper towel, fold, bag, and refrigerate 90 days; harvest sprouts from the towel (planting any stuck towel with the seed is fine). All three methods work; the paper-towel method can rot in some conditions. Seedlings about 2" tall can move to individual pots, then into the ground roughly 6 months later if they have plenty of shade. To create multi-stemmed maples, let seedlings flush to about 6" then clip the very tops of upright branches to force lower branching, without removing too many leaves.
PESTS, DISEASES AND STRESS Provide excellent air circulation to prevent powdery mildew. Stressed bonsai are far more prone to disease and insect pests, so give the right environment to keep the tree healthy. Seedlings are vulnerable to "damping off" - they get skinny at the soil line and collapse, usually fatally; good airflow (e.g. a nearby fan) helps prevent it.
SEASONAL CARE SUMMARY Spring: repot before buds open; feed high-nitrogen as buds open; pinch first vigorous shoots to keep internodes short; wire while structure is visible; avoid heavy pruning that provokes frost-tender growth. Summer: keep soil evenly moist (water daily in the heat); switch to diluted feeding; defoliate healthy green-leaved trees at midsummer; take softwood cuttings; wire in full leaf; make large structural cuts in mid-to-late summer for fast callusing; shield from harsh sun/wind. Autumn: switch to nitrogen-free feed and taper off; do maintenance pruning and thinning after leaf fall; protect autumn wiring with raffia; enjoy the deep red fall color. Winter: do not feed; do the main structural/corrective pruning in mid-winter (early February in most zones, January in southern zones); water only as needed; do not wire (brittle branches); protect from severe frost, remembering roots in containers are about 2 zones less cold-hardy than the top of the tree.