
Smoky Pulled Pork Shoulder
What Temperature and Timing Should I Use? I cooked a number of pork shoulders sous vide at various bath temperatures, cooking each until I achieved complete breakdown of tough connective tissue. Here's what I found: At a bath temperature of 200°F, pork shoulders take only a few hours to become fall-apart tender. At 145°F, this same process can take over a day. Cooked at 145°F, the pork has a firm, almost steak-like texture and can be easily sliced, but not easily pulled apart. It's also very juicy. Cooked at 200°F, the pork shreds at the slightest touch but is also quite dry — most of the internal moisture leaks out into the bag and can't be reabsorbed. Like Goldilocks, I like my pork cooked right in the middle: 165°F for 18 to 24 hours yields pork that is pull-apart tender, but still moister than anything you've ever pulled out of the oven or off the grill. Incidentally, cooking the pork for longer periods will eventually allow it to break down to the point where individual muscle fibers begin to soften, giving the pork an almost mushy texture that I find off-putting. Recommended Sous Vide Pork Shoulder Temperatures: 145°F for 18 to 24 hours = Sliceable and extra moist; 75°C for 18 to 24 hours = Shreddable and moist.
Ingredients
| — | pork shoulder | |
| — | Pork spice packet, or a rub of: paprika, brown sugar, salt, mustard seed, black pepper, garlic powder, oregano, coriander seed, red pepper flakes (dry mustard, oregano, brown sugar, smoked paprika, ground ginger) | |
| 1/4 tsp | 1.3 ml | pink curing salt (Prague Powder #1), optional for a pink smoke ring |
| 1/2 tsp (about 3 g) | liquid smoke (if using the liquid smoke method) | |
| — | your favorite barbecue sauce (Kansas City-style or Eastern North Carolina-style), to serve |
Instructions
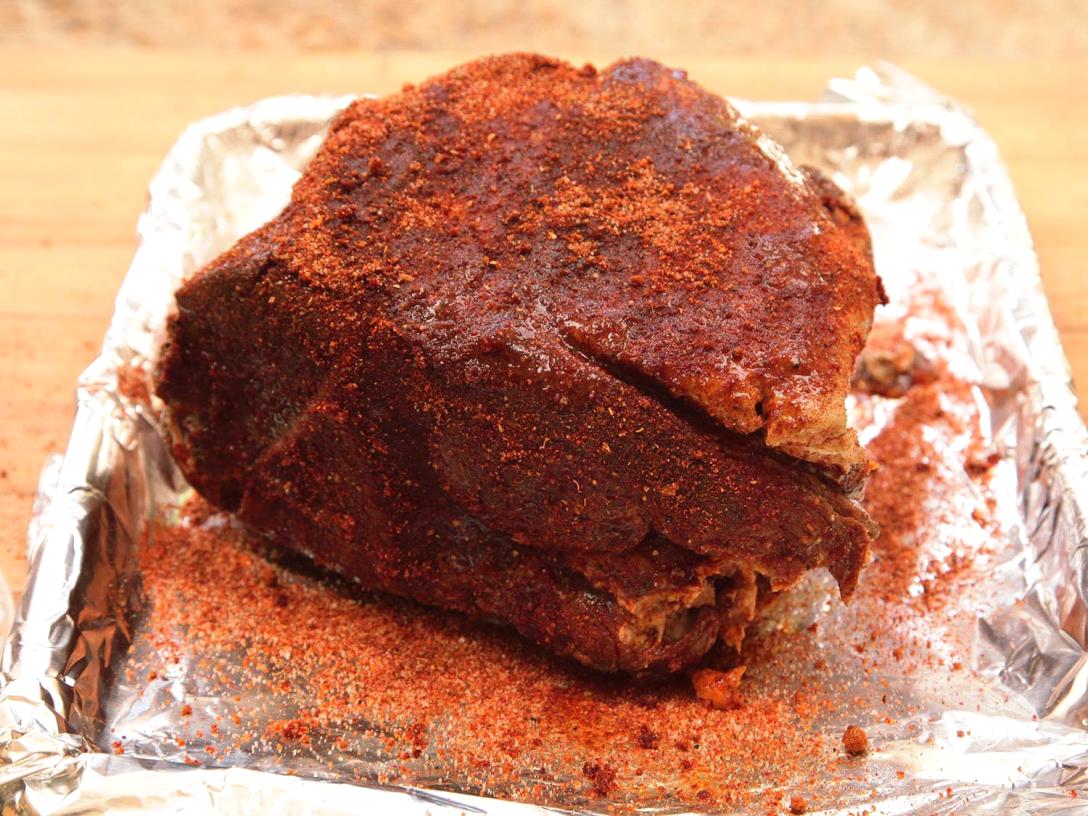
Step 1: Apply the Rub — Pork spice packet + dry mustard, oregano, brown sugar, smoked paprika and ground ginger, OR: Working in batches, combine paprika, brown sugar, salt, mustard seed, black pepper, garlic powder, oregano, coriander seed, and red pepper flakes in a spice grinder and reduce it all to a fine powder. (See the full recipe for exact measurements.) If you'd like your pork shoulder to have a pink smoke ring, add a quarter teaspoon of pink curing salt (Prague Powder #1) to your spice mixture. Set aside three tablespoons of the mixture; you'll use that to re-rub the shoulder before finishing. Rub the mixture generously all over the shoulder.
Step 2: Seal the Pork — Place the pork inside a vacuum-sealer bag. (Fold over the top while you add the pork so that no rub or pork juices get on the edge of the bag, which can weaken the seal.) Add a half teaspoon (about three grams) of liquid smoke to the bag if you're using the liquid smoke method. Don't worry much about distributing the liquid smoke evenly; it'll spread around during cooking. Seal the bag using a vacuum sealer.
Step 3: Preheat the Water Bath — Set the temperature on your sous vide cooker to 75°C for pull-apart-tender pork, or to 63°C for pork that is tender but still sliceable.
Step 4: Cook — Drop your sealed pork into the water bath, set a timer for 18 to 24 hours, and relax. For extended cooks like this, cover the top of the container with foil or plastic wrap to prevent excessive evaporation that could lead to the circulator shutting down.
Step 5: Pat Dry — Once the pork is cooked, you can chill it in the refrigerator for up to a week before continuing, or just go straight to the finishing steps. Get rid of excess moisture by removing the pork and patting it down thoroughly with paper towels. If desired, add the juices from the sous vide bag to your favorite barbecue sauce and reduce it over the stovetop to give your sauce extra porky flavor.
Step 6: Reapply Rub — The first sprinkling of rub did a good job of getting flavor into the pork. A second coat of rub now gives you a good foundation for building up that crunchy, dark, flavorful bark.
To Finish on a Smoker — Step 7: Light It Up! To finish over live fire, light up a smoker and set it to 300°F, or ignite a half chimney of coals and spread them out over half of the coal grates of a charcoal grill. Add a few chunks of hardwood (no need to soak it), and as soon as it begins smoldering, place the pork in the smoker or on the grill, away from any direct heat. For a gas grill, light half the burners and leave the other half off; place the wood chunks in a foil boat directly over the hot side, and the pork over the cooler side. Step 8: Smoking! Cover and cook, adding a few pieces of wood and coals as necessary and maintaining the air intake valves to keep the cooker hovering at around 275 to 300°F at all times. Step 9: Finished! Keep cooking until the pork has achieved a deep, dark mahogany crust and pulls apart when you pick at it. This will take about an hour and a half to two hours. Continue with step 10.
To Finish in the Oven — Step 7: Slow-Roast — Place the pork on a foil-lined baking sheet fitted with a wire rack. Put it in a preheated 150°C oven and cook until the exterior reaches a dark mahogany crust, about an hour and a half. Remove from the oven and continue with step 10.
Step 10: Shredding and Saucing — The meat is ready to be pulled! Easiest with two forks, or with heavy-duty plastic gloves go in with your hands. Shred it apart into big, tender chunks, or transfer to a cutting board and chop more finely with a cleaver or chef's knife. Note: If cooking the 145°F version, you won't be able to shred it; you're better off slicing with a knife. Once shredded, serve with your favorite barbecue sauce — either a sweet and sticky Kansas City–style sauce or a vinegary-hot Eastern North Carolina–style sauce.